Guide
Home Espresso for Beginners: From Machine to Cup
Published: 2026-04-07
Home espresso is the deep end of the coffee pool. It is more demanding, more expensive, and more frustrating than any other brewing method. It is also the most rewarding. When you pull a perfect shot — thick crema, syrupy body, balanced sweetness — in your own kitchen, the satisfaction is unmatched. This guide will help you get there without the usual months of wasted beans and disappointment.
What Is Espresso, Really?
Espresso is not a bean or a roast level. It is a brewing method. Finely ground coffee is compacted into a dense puck, and hot water is forced through it at approximately 9 bars (130 PSI) of pressure. The result is a small, concentrated shot (typically 30-40ml) extracted in 25-35 seconds.
This pressurized extraction pulls compounds from the coffee that no other method can access — oils, sugars, and soluble solids that create espresso’s characteristic body, crema, and intensity.
Choosing Your Equipment
The Grinder Comes First
This is the most important piece of advice in this entire guide: spend more on your grinder than your machine. A $300 grinder paired with a $200 machine will produce better espresso than a $200 grinder paired with a $500 machine. Every time.
Espresso demands extremely fine, extremely consistent grinding. Small changes in grind size — adjustments invisible to the naked eye — can transform a shot from sour and thin to rich and sweet.
Budget options ($150-300):
- 1Zpresso JX-Pro (manual) — exceptional value, produces grinds that rival $500+ electric grinders
- Eureka Mignon Notte — entry-level electric with stepless adjustment
Mid-range ($300-600):
- Eureka Mignon Specialita — quiet, consistent, excellent for home use
- DF64 (with SSP burrs upgrade) — single-dose design, very popular in the home barista community
The Machine
Espresso machines fall into several categories, each with different trade-offs.
Manual Lever Machines ($150-350)
The Flair Espresso Pro 2 is the standout here. You generate pressure by pulling a lever, giving you complete control over the extraction. There is no pump, no boiler for steam — just pure, manual espresso. The learning curve is steeper, but the quality ceiling is remarkably high for the price. The main limitation is no steam wand, so milk drinks require a separate frother.
Thermoblock Machines ($300-500)
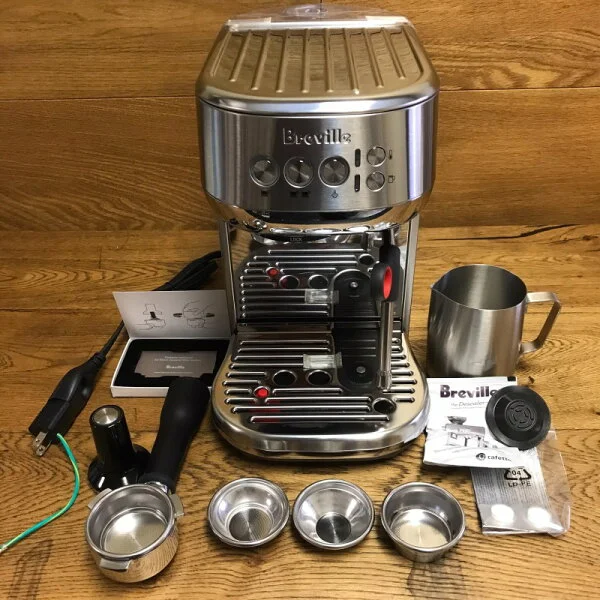
The Breville Bambino Plus is the best entry point for those who want milk drinks. It heats up in 3 seconds, has an automatic steam wand that produces surprisingly good microfoam, and pulls respectable shots. It is not as refined as more expensive machines, but it removes friction from the learning process.
Heat Exchanger / Single Boiler ($500-900)
The Rancilio Silvia is the classic choice in this range. It has been the go-to home espresso machine for over 20 years for good reason — a commercial-grade group head, excellent build quality, and the ability to produce outstanding espresso once you learn its quirks (temperature surfing). The Silvia rewards those willing to invest time in mastering it.
Dual Boiler ($1200+)
Machines like the Breville Dual Boiler and Lelit Bianca allow you to brew and steam simultaneously with independent temperature control. This is the enthusiast tier — excellent machines, but overkill for most beginners.
Pulling Your First Shot
The Recipe
Start with this baseline and adjust from there:
- Dose: 18g of finely ground coffee
- Yield: 36g of liquid espresso (1:2 ratio)
- Time: 25-32 seconds from pump start to pump stop
- Temperature: 93°C (200°F) — use your machine’s default to start
Step by Step
-
Grind 18g of coffee into your portafilter. The grounds should feel like fine sand — slightly finer than table salt.
-
Distribute the grounds evenly. Use a WDT (Weiss Distribution Technique) tool — a set of thin needles that you stir through the grounds to break up clumps. This single tool costs $10 and makes a massive difference in shot consistency.
-
Tamp with firm, level pressure. Press straight down with about 15kg of force (practice on a bathroom scale). The exact pressure matters less than being consistent and level.
-
Lock in the portafilter and start the shot immediately. Leaving the loaded portafilter in the hot group head too long can scorch the top of the puck.
-
Watch the flow. The first few seconds should show dark, syrupy drips that gradually merge into a thin, steady stream. If it gushes out in under 15 seconds, grind finer. If it barely drips and takes over 40 seconds, grind coarser.
-
Weigh the output. Place a scale under your cup and stop the shot at 36g. Timing and weight together tell you everything about the extraction.
Dialing In: The Art of Adjustment
Dialing in means adjusting your variables until the shot tastes right. Here is how to troubleshoot:
Sour / Thin / Watery Shot (Under-extracted)
- Grind finer
- Increase dose slightly (try 18.5g)
- Increase water temperature by 1-2°C
- Ensure even distribution — channeling causes under-extraction
Bitter / Harsh / Ashy Shot (Over-extracted)
- Grind coarser
- Decrease dose slightly (try 17.5g)
- Decrease water temperature by 1-2°C
- Pull a shorter shot (stop at 32g instead of 36g)
Uneven / Mixed Flavors (Channeling)
- Improve your WDT technique — stir more thoroughly
- Check your tamp is level
- Inspect the puck after extraction — holes or cracks indicate channeling
- Consider a puck screen (a mesh filter placed on top of the puck) to improve water distribution
Common Beginner Mistakes
Buying Pre-Ground Coffee
Pre-ground coffee goes stale within minutes of grinding. More importantly, you cannot adjust grind size — which means you cannot dial in. A grinder is not optional for espresso.
Using Stale Beans
Espresso is best with beans that are 7-21 days off roast. Too fresh (under 5 days) and CO2 causes the puck to bubble and channel. Too old (over 4 weeks) and the flavors flatten.
Ignoring the Scale
Volumetric measurement does not work for espresso. A “double shot” can be 30g or 45g depending on the bean and grind — and those will taste completely different. Weigh your dose in and your yield out. A $15 jewelry scale with 0.1g resolution is sufficient.
Changing Too Many Variables at Once
When dialing in, change one thing at a time. Adjust grind size first — it has the biggest impact. Only adjust dose, temperature, or ratio once grind size is optimized.
Neglecting Machine Maintenance
Backflush your machine weekly with water (daily if using it heavily). Use Cafiza or a similar detergent for monthly deep cleaning. Descale every 2-3 months depending on your water hardness. Dirty machines produce bitter, rancid-tasting espresso.
Water Matters
Tap water is usually too hard for espresso. Mineral scale builds up inside your machine and degrades shot quality. Use filtered water or make your own espresso water using Third Wave Water mineral packets or the RPavlis recipe (distilled water with a small amount of potassium bicarbonate). This is an advanced topic, but proper water can make a noticeable improvement.
The Bottom Line
Home espresso is a skill that takes weeks to develop and years to refine. Start with a good grinder, fresh beans, and a scale. Accept that your first dozen shots will be mediocre — that is normal. Focus on one variable at a time, taste critically, and keep notes on what works.
The moment your home shot surpasses what your local cafe produces — and it will happen sooner than you think — you will understand why home espresso enthusiasts never look back.
☕ Featured Gear in This Article